Category: Haul Out

The 12 Mile Journey

It was the best of times.  It was the worst of times….as the story goes.  We are safely tucked behind the near impenetrable boarders of New Zealand from any outsiders.  Unless you are bringing big dollars to the economy like the America’s Cup Yacht race et al.  We have weathered the various lockdown levels from 4 to 1 and are not the worst for wear.  Last February and early March just before the holy lockdown happened, we were perched above the ground at Harbourside Yacht Works.  Dazzler’s bottom had two shiny new coats of Sea Zone 60 bottom paint.  And we were finishing up with giving Sparkle, our tender, a new paint job as well.  We completed a few other hard stand projects before launching back into the water. 

Purchased at Wynn Fraser Paints

Once in the water and a few days prior to New Zealand’s borders slamming shut into level 4 lockdown we docked at Whangarei Marina where we planned to wait out the world pandemic crisis.  Normally we would have departed the chilly climate of New Zealand in April for the warmer waters in the tropical islands of Fiji.  This year added a higher degree of difficulty to our plans to say the least.  

The beginning of August, I noticed that Dazzler’s bottom paint just below the water line was starting to look a bit shaded with marine slime coating.  It had been just over four months since we dropped her in the water and it was getting time to think about giving her underside a bit of a cleaning.  August is about as the middle of winter as you can get here in New Zealand.  I wasn’t looking forward to jumping into the water for any reason.  So, I started to research the possibility of having Dazzler lifted out of the water and get a light pressure wash done on her underside.  

After several days of yard and lift shopping we settled on the hydraulic trailer lift at Marsden Cove Marina.  We made an appointment for the 19th of August for a haul, wash and splash.  

As you can see, after four months there was very little slime coat on Dazzler’s bottom.

Any plans to leave the Whangarei Marina should be coordinated with Mother Nature and her tides.  Marsden Cove Marina is approximately 11 miles down river near the river’s mouth which  is about two hours one way.  Allowing two to three hours for the haul, wash and splash would mean that we would be at low tide and would have difficulty getting back into our slip.  Thus we decided to stay the night at a dock in Marsden Cove Marina and head up river the next day at or near high tide.

When the 19th arrived we were out of the slip on time, but we didn’t plan to make Hatea River bridge opening and we had to wait until 0830 hours for the bridge operator to open the bridge.  Because we were a little behind schedule we called Marsden Cove Marina to let them know we’d be about 30 minutes late.  

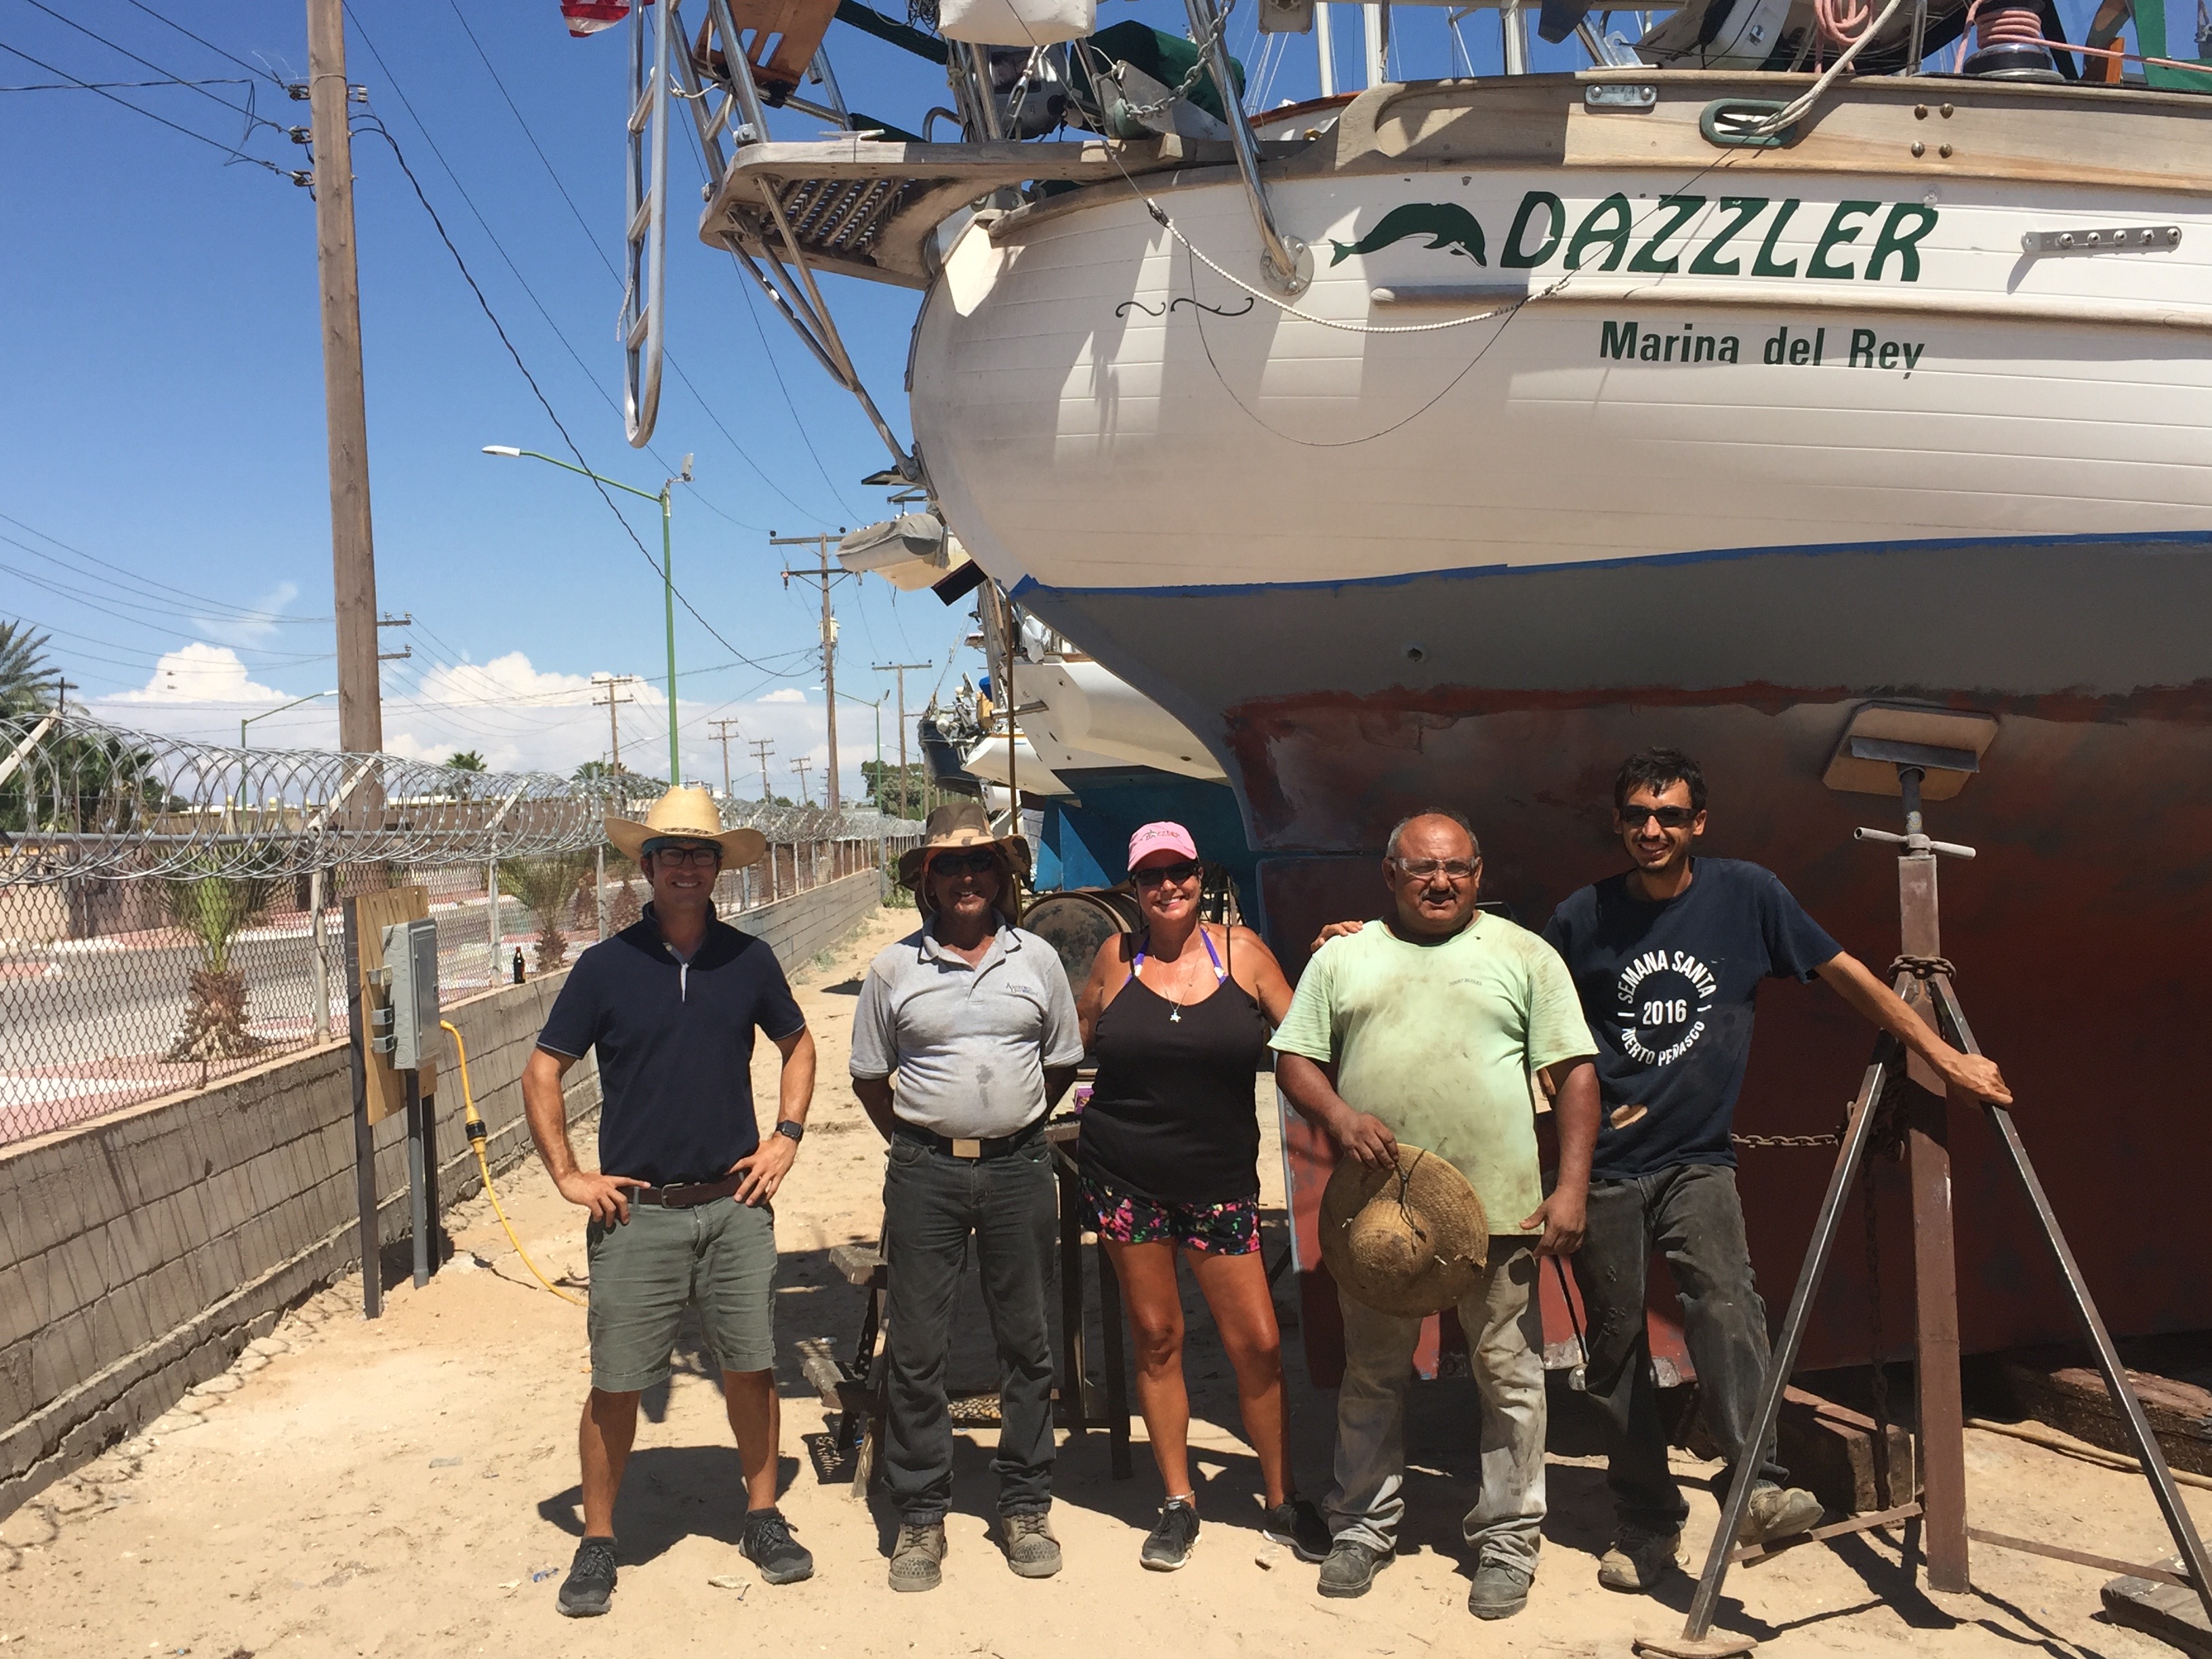
Once we arrived and after tying up to the haul out dock, the yard crew lowered their new looking hydraulic trailer under Dazzler.  The trailer had a gap between its left and right sides with beefy sets of dual tires along each rail.  The hydraulic operator handled the trailer’s equipment like a highly trained surgeon.  The trailer’s hydraulic pads were raised one by one until they gently made contact with Dazzler’s hull.  Before we knew it Dazzler was being leveled on the trailer and pulled out of the water.  I have to say of all the different times she has been pulled out of the water this time caused the least amount of stress.  

The crew pulled Dazzler across the road and into the wash bay where they used a pressure washer to spray off what is know as the slime coating that builds on the surface of the paint.  There were no barnacles or other larger marine organisms attached to her bottom.  The operator had the pressure turned down so low that there was almost no leaching of the paint off of Dazzler’s bottom.  There were four hydraulic pads along each side of her hull.  The hydraulic operator put braces under Dazzler’s keel and lowered one pad at a time to allow the spray operator access to clean under the contact points of her hull.  

After all the spraying had been completed, I removed the old shaft zinc and attached a new one.  Less than an hour later she was ready to be moved back down to the water and launched.  We walked alongside like we were line tenders of a Macy’s balloon walking down 5th Avenue.  Once in the water again and tied to the haul out dock it was all over except for paying the bill.  Off to the office we went.  About $300.00 NZD (@$195.00 USD) later we were done.  We stopped at the cafe for a bite to eat and then back to Dazzler to move her to her dock across the channel for the night.  Some good friends Deb and Phil Perfitt of the vessel Coastal Drifter were boat watching in the marina and treated us to a nice dinner and companionship.  Great way to finish off a productive day.

The next morning early we were untied and heading up river back to Whangarei Marina.  All is  well that ends well. 

Just a side note:  Sea~Zone 60 self polishing ablative bottom paint by Altex.  Wow!  Last season when we arrived in New Zealand we needed to re-paint Dazzler’s bottom.  We settled on Sea~Zone 60 for our new paint.  We also had to apply a primer coat to insure chemical bond to the older sanded hard Trinidad paint.  During the cruising season of 2019, we cruised the waters of Tonga and Fiji for almost six months.  During which we had to give Dazzler’s bottom a wipe down twice to remove the slime coat.  The self polishing properties of Sea~Zone 60 paint seemed to work as advertised.  I was impressed as to how clean the bottom stayed during our travels.  

Last January when we hauled Dazzler out prior to our USA trip, we found the condition of the bottom paint to be in very good condition with no visible barnacles.  Impressive!  There were a few thinned areas but over all in good condition.  

Once we returned from the states, we decided to add two additional coats of Sea~Zone 60 to cover up the few thinned areas.  The paint is easy to apply, easy to maintain and appears to hold up well against various marine organisms just as advertised.  

I would like to see the paint durability a bit more substantial to maybe get two years of use before re-coating.  But it’s ability to fend off marine organisms is very good.  The only down side to Sea~Zone 60 appears to be its retail price.  We will probably add two more coats next March in preparation of departure back into the sailing lifestyle. 

Cheers!

Captain Dan

P.S.  We both were very impressed with the ease, operation and the skill of the Marsden Cove Haul out crew.  Sending a special thanks out to Mark, Remi and Adam for a job well done! We highly recommend their services. It would be well worth your time and money in our humble opinion.

Here’s a short video of the haul out. Enjoy!

Dazzler Haul Out Puerto Peñasco 2017

cabrales-button.png
Boat owners know that their vessel’s time in the water is clicking down to the time when their vessel’s bottom needs an update to the antifouling paint. Well, this last summer was Dazzler’s turn in the slings. I had done some research and had spoken with other cruisers that had spoken highly of a Boatyard facility in Puerto Peñasco. After making an appointment with Salvador Cabrales, III, at the Astilleros Cabrales SA Boatyard, all that was left to do on my part was get Dazzler to the Ways. The Ways is the space in front of the yard where the slings of the boatlift are lowered into the water after your boat is in the Ways. In the case of the Cabrales yard, they had lowered the straps into the water and had me maneuver Dazzler over the top of the slings. While the line handlers on the each side of the dock next to Dazzler had a secure hold of the lines the lift cinched up the slings to the keel of Dazzler and started to hoist her out of the water. After a few strap adjustments, Dazzler was hoisted clear of the water and being transported into the lot across the street from the main yard where she was placed on secured jack stands and railroad ties under her keel.

That afternoon, the workers power washed Dazzler’s hull in preparation for sanding. Several months prior to arriving in Puerto Peñasco, I had observed several osmotic fiberglass blisters near the water line of Dazzler while cleaning the bottom. While she was on the stands it made it possible to get a closer look at the blisters and decide which course of repair I would perform or have performed. With the yard manager, Salvador, we inspected the blisters along the water line. After much discussion, Salvador provided me with an option that I was unfamiliar with. His yard has paint plainer equipment that will strip paint and thin layers of fiberglass from the hull.

img_3809.jpg
This shows the stripped paint and fiberglass and the moisture readings from the first (below) and second (center) days readings.

This allows the deeper layers of fiberglass to dry in the arid desert of northern Mexico while on the hard. It also stripped away thin layers of the damaged fiberglass and made it easier to fair out the hull. After the paint had been removed, Salvador used a moisture meter to verify the moisture content of the fiberglass. While a few areas were in excess of 10, many were below 10 after the paint and fiberglass had been exposed to the dry heat. The second day all the readings were well below 10, in the low single digits. This was our green light for starting the repair of the exposed waterline. It was decided that the fiberglass would first be coated with West Systems epoxy, The next several layers would be West Systems epoxy with hard micro beads to build back the shallow depression created by the paint/fiberglass removal process. Once the level had been gradually built up, five coats of barrier coat primer were applied to the repaired area. It was feathered into the adjacent areas and it was challenging to find any uneven areas of the repair. I was impressed. The workers then began applying the Zspar bottom paint I had brought down with me from the states last fall. Prior to using the paint, we took it to a local paint store to have it shaken for about 10 minutes to mix up the cupreous oxide prior to having it applied to the bottom of Dazzler. The local paint store we used didn’t charge us anything so I found a few supplies from their shelves to show my appreciation for shaking up our paint.

The second day in the yard, I was busy myself with two projects below the waterline. I wanted to replace the plastic Depth, Speed, Temp, (DST) transducer thru hull with a new one. I also wanted to replace the Shaft seal/packing gland with a new one.

The transducer thru hull was the easier of the two jobs. I first removed the transducer and then drove a tapered wooden plug into the thru hull opening from the outside. I then cut off the excess wooden plug flush with the flange of the thru hull and used a hole saw to cut out the old thru hull fitting. This worked like a champ. I then preparing the hole by coating the inside with a thin layer of epoxy and waited for it to set up. After the epoxy was setup, I bedded the new transducer thru hull with Sikaflex tightened up the interior thru hull nut and it was done.

The shaft packing replacement was another story. It was obvious that the flange attached to the shaft had to first be unbolted from the flange at the rear of the transmission. Then you have to remove the shaft flange from the prop shaft. This little job took about two hours and a couple pounds of expletives and sweat. Ultimately, I had to use a spark plug socket placed on the shaft between the two flanges. I used the mechanical advantage of two bolts connecting both flanges to each other to pulling the shaft flange towards the transmission flange. Because there wasn’t enough clearance between the transmission flange and the rear case of the transmission, I had to take the bolts off often and add more washers to the bolts. After doing this several times and dropping tools and washers into the abyss called the bilge, the shaft flange was removed. This was a tedious job, but well worth the effort. The old shaft packing and hose was removed and the new shaft packing and hose were installed. The shaft flange and shaft were cleaned up, greased and re-installed and bolted back to the transmission flange. I forgot to mention that all this job had to be done from the lazarette while lying on my stomach and reaching down to the shaft area. Boats! What we do because we love them!

As the worker were finishing up with the waterline repairs, Jilly and I had picked up a few kilos of Carne para Asada and prepared a BBQ for the workers at the yard next to Dazzler.  We completed our appreciation for their hard work with grilled Carna Asada, onions, peppers, tortillas, salsa and icy cold Coca Cola. Smiles abounded!

IMG_3837
Paint complete!

The workers were finishing up with the bottom paint and Dazzler was prepared for launch. She looked great! Timing of the launch must be coordinated with the tides of the area. Puerto Peñasco has extreme tides that can exceed 20 feet and therefore knowing when high tide occurs is important. The morning of the launch, there was no water in the bottom of the Ways. Only mud!

IMG_1308
Salvador on the right along with Jilly and the rest of the hard working crew.

By late morning the tide had filled the ways and we were ready for launching. Dock lines and line handlers were in place and we were being lowered into the Ways. I asked Salvador if the slings could remain in place while I check the transducer and shaft packing glands for any unexpected water leaks. After I gave the all clear Dazzler was lowered into the sea, released from the slings and we were backing out of the Ways. We motored to the Fonatur Marina in Puerto Peñasco to give Dazzler a good cleaning after being in the dusty yard. The next day we were southbound toward Refugio at Angel de La Guarda.

My compliments to Salvador Cabrales and the crew at Astilleros Cabrales. A great job and a wonderful experience! We have been and will continue to recommend you and your team to other cruisers.

Cheers!

Captain Dan
SV Dazzler